
Create Your First Flutter Barcode Scanner


This article was originally published on the Waldo blog.
Introduction
Barcodes are everywhere—If you have gone grocery shopping you have most likely encountered them. Each item that the store sells has a code that uniquely identifies it. The barcode is a visual representation of that code that a barcode scanner can read. Barcodes make it possible for cashiers to total up the cost of your groceries by simply scanning each item with a laser scanner.
Beyond grocery items, barcodes are used in many other contexts:
- In warehouses, to identify products entering and leaving.
- At the post office, to identify parcels.
- In libraries, to identify books.
- For store loyalty cards, to identify consumers.
- In hospitals, to identify patients.
- In airports, to identify pieces of luggage.
- On event tickets, to control entry.
- On PDF documents, to encode form responses.
Today, barcodes can be scanned by not only lasers, but by smartphone cameras too. Many retailers, like Amazon and Home Depot, now include barcode scanners in their apps to enable shoppers to conveniently look up information about products. This improves the shopping experience and helps shoppers find the best prices for products.
Other day-to-day experiences are enriched by smartphone readable barcodes, such as exploring a museum. Many museums now include barcodes in exhibits to help visitors retrieve more information via a smartphone to enhance their experience.
In this article, we’ll learn about some different types of barcodes, how to create them, and how to build an app in Flutter to scan them using the camera on a smartphone.
Barcodes were invented in 1951, inspired by Morse code, which uses sequences of dots and dashes to encode letters
Types of Barcodes
Barcodes were invented in 1951, inspired by Morse code, which uses sequences of dots and dashes to encode letters. Instead of dots and dashes, the first barcodes use bars of varying thickness. Over the years, barcodes have become more sophisticated and applied in a wide range of contexts.
In the next section, we explore different types of barcodes and how industry uses them.
One-Dimensional Barcodes
The most common type of barcodes are one-dimensional barcodes made of vertical lines. You find these on product packaging at the grocery store, on magazines, and on library books. See below for an example of a barcode of this type that encodes a universal product code (UPC).

A UPC is a type of one-dimensional barcode used by retailers worldwide to identify items sold. Other types of one-dimensional barcodes include International Standard Book Numbers (ISBNs) and codes used for postal packing.
Two-Dimensional Barcodes
Two-dimensional barcodes are a newer type of barcode that take up the same amount of physical space, but use vertical and horizontal patterns, and usually take the form of a square. They can encode more information than one-dimensional barcodes. The most common two-dimensional barcode is a quick response (QR) code, which was invented in 1994 and gained popularity with the emergence of smartphones. See below for an example.
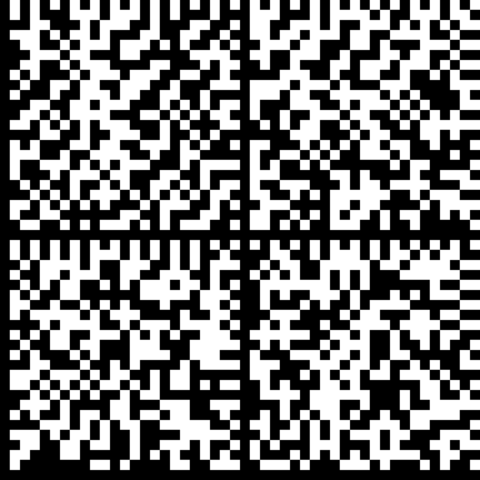
You find QR codes in all kinds of places today, from museums to outdoor advertising and on home appliances. Their uses include encoding pictures, opening a website, and connecting a device to a network.
Building A Barcode Scanner in Flutter
Now that we have a better understanding of what barcodes are and their uses, let’s dive into building a barcode scanner in Flutter. Luckily, Flutter has an active community that contributes open source packages to add capabilities to your apps. You can find these hosted on pub.dev.
For our app, we’ll use a package named Scan. This package enables you to easily add a widget to your app to display your phone’s camera so that you can point it at a barcode for scanning.
Our demo app contains a home screen with a button to launch the scanner. After scanning the barcode we’ll display the decoded contents of the barcode on the home page. We’ll walk through all the steps needed to install this package and build our demo app.
We will walk through all the steps needed to install this package and build our demo app.
Step 1: Create a Basic App Layout
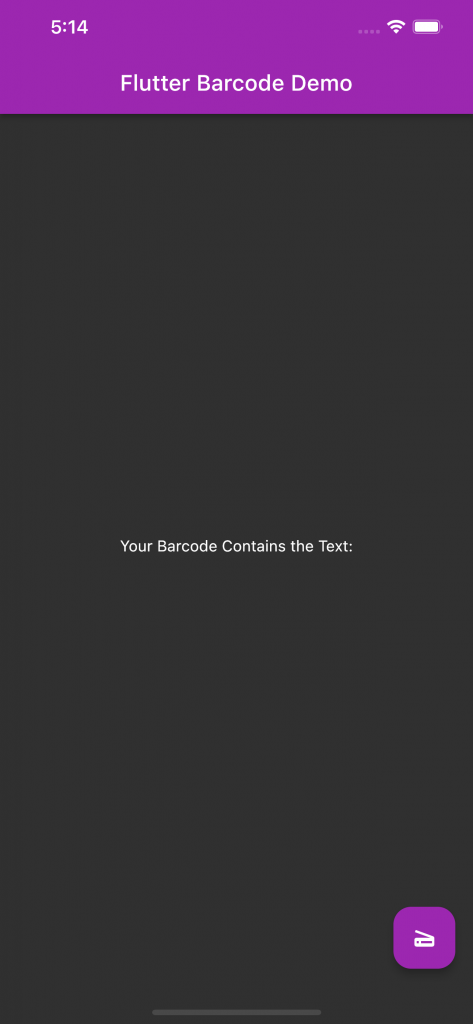
We’ll start our demo app by creating a simple skeleton layout. The code below creates a home page including an AppBar with the title “Flutter Barcode Demo” and the text “Your Barcode Contains the Text:” in the body area of the app. Since this app will use the camera on a real device, we cannot use dartpad.dev. Instead, use your preferred code editor. Visual Studio Code and Android Studio provide great support for Flutter. Once you have created the default Flutter starter app, replace the code in main.dart with the code shown below. Connect a real device to your computer and make sure your app can launch on your device. In the next step, we’ll add the dependencies for our barcode scanning capability.
import 'package:flutter/material.dart';

void main() {
  runApp(const MyApp());
}

class MyApp extends StatelessWidget {
  const MyApp({Key? key}) : super(key: key);

  @override
  Widget build(BuildContext context) {
    return MaterialApp(
      theme: ThemeData.dark(),
      debugShowCheckedModeBanner: false,
      home: const MyHomePage(title: 'Flutter Barcode Demo'),
    );
  }
}

class MyHomePage extends StatefulWidget {
  const MyHomePage({Key? key, required this.title}) : super(key: key);

  final String title;

  @override
  State<MyHomePage> createState() => _MyHomePageState();
}

class _MyHomePageState extends State<MyHomePage> {
	var _scanResult = '';
  @override
  Widget build(BuildContext context) {
    return Scaffold(
      appBar: AppBar(
        backgroundColor: Colors.purple,
        title: Text(widget.title),
      ),
      body: Center(
        child: Column(
          mainAxisAlignment: MainAxisAlignment.center,
          children: <Widget>[
            const Text(
              'You Barcode Contains the Text:',
            ),
            Text(
              _scanResult,
              style: Theme.of(context).textTheme.headline4,
            ),
          ],
        ),
      ),
      floatingActionButton: FloatingActionButton(
          onPressed: () {},
          tooltip: 'Scan Barcode',
          backgroundColor: Colors.purple,
          shape: const RoundedRectangleBorder(
              borderRadius: BorderRadius.all(Radius.circular(16.0))),
          child: const Icon(
            Icons.scanner,
            color: Colors.white,
          )),
    );
  }
}
Step 2: Install the Scan package
Let’s now add the Scan package from pub.dev to our app. Flutter provides an easy way to do this. Open a terminal in the root folder of your app and type in the command below.
flutter pub add scan
This command updates your pubspec.yaml file with the dependency for the Scan package. It then downloads the required library files to your app’s project folder. Take a look at your pubspec.yaml file; it should look similar to the code snippet below.
dependencies:
  flutter:
    sdk: flutter

  # The following adds the Cupertino Icons font to your application.
  # Use with the CupertinoIcons class for iOS style icons.
  cupertino_icons: ^1.0.2
  scan: ^1.4.3
Once you’ve confirmed that the dependency is included in your app, add the following import statement to the top of the main.dart file. You shouldn’t see any error messages, but you will see a warning that this import is not being used. That message disappears once we include the ScanView widget in our app.
import 'package:scan/scan.dart';
Step 3: Update your iOS and Android Configuration Files
Next, we need to make a few additions to the iOS and Android configuration files so our app can access the phone’s camera. Underlying every Flutter mobile app is an actual native iOS and native Android app that hosts the Flutter code when run on a device. Apps that use the device camera must declare this so that the user can grant permission to access the camera when the app first loads.
We’ll start with the iOS update. Open the file ios/runner/info.plist, found under the root directory of your app. Add the key and string elements below at the end of the file.
<key>NSCameraUsageDescription</key>
<string>Your Description</string>

<key>io.flutter.embedded_views_preview</key>
<string>YES</string>
Next, to apply the required update for Android, open the file android/app/src/main/AndroidManifest.xml, found under your app’s root directory. Add the uses-permission element at the top, so that your file looks similar to the snippet below.
<manifest xmlns:android="<http://schemas.android.com/apk/res/android>"
    package="com.example.flutter_barcode_scanner">
   <uses-permission android:name="android.permission.CAMERA" />

...
Finally, open android/app/build.gradle to increase the minSdkVersion to 19 from the default of 16. Find the defaultConfig section and update it so that it looks like this:
defaultConfig {
        // TODO: Specify your own unique Application ID (<https://developer.android.com/studio/build/application-id.html>).
        applicationId "com.example.flutter_barcode_scanner"
        minSdkVersion 19
        targetSdkVersion 30
Save all your changes. We’re now ready to add the ScanView widget.
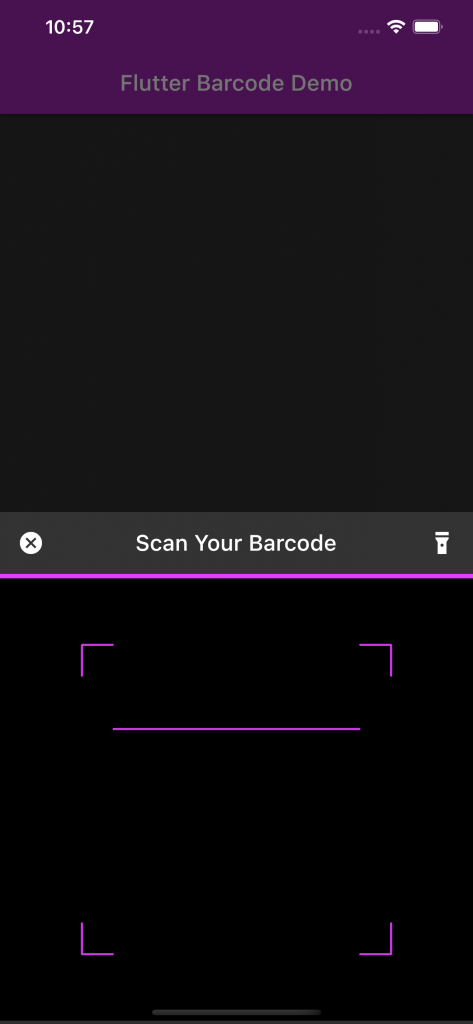
Step 4: Add ScanView Modal
It is now time to add the code needed for the barcode scanner. The scanner will slide open from the bottom as a modal BottomSheet. We’ll trigger this sheet to open via the floating action button on our home page.
Add the functions below to the bottom of the _MyHomePageState class.
_showBarcodeScanner() {
    return showModalBottomSheet(
      isScrollControlled: true,
      context: context,
      builder: (builder) {
        return StatefulBuilder(builder: (BuildContext context, setState) {
          return SizedBox(
              height: MediaQuery.of(context).size.height / 2,
              child: Scaffold(
                appBar: _buildBarcodeScannerAppBar(),
                body: _buildBarcodeScannerBody(),
              ));
        });
      },
    );
  }

  AppBar _buildBarcodeScannerAppBar() {
    return AppBar(
      bottom: PreferredSize(
        child: Container(color: Colors.purpleAccent, height: 4.0),
        preferredSize: const Size.fromHeight(4.0),
      ),
      title: const Text('Scan Your Barcode'),
      elevation: 0.0,
      backgroundColor: const Color(0xFF333333),
      leading: GestureDetector(
        onTap: () => Navigator.of(context).pop(),
        child: const Center(
            child: Icon(
          Icons.cancel,
          color: Colors.white,
        )),
      ),
      actions: [
        Container(
            alignment: Alignment.center,
            padding: const EdgeInsets.only(right: 16.0),
            child: GestureDetector(
                onTap: () => controller.toggleTorchMode(),
                child: const Icon(Icons.flashlight_on))),
      ],
    );
  }

  Widget _buildBarcodeScannerBody() {
    return SizedBox(
      height: 400,
      child: ScanView(
        controller: controller,
        scanAreaScale: .7,
        scanLineColor: Colors.purpleAccent,
        onCapture: (data) {
          setState(() {
            _scanResult = data;
            Navigator.of(context).pop();
          });
        },
      ),
    );
  }
Next, add the ScanController variable to the top of your _MyHomePageState class, so that you now have two state variables: one for the scan result and another for the scan controller.
class _MyHomePageState extends State<MyHomePage> {
  ScanController controller = ScanController();
  var _scanResult = '';
..
Step 5: Update Floating Action Button to Display the ScanView
Now you can update your floating action button to show the bottom sheet when pressed. Update the floating action button constructor so that it looks like the code snippet below.
floatingActionButton: FloatingActionButton(
          onPressed: _showBarcodeScanner,
...
Run your app on your actual physical device to confirm that the scanner appears when the floating action button is pressed. In the next step, we shall create some barcodes to test our scanner with.
Step 6: Create Barcodes for Testing
To test our barcode scanner, we need some barcodes. There are many barcode generators online. You can find one at this site that lets you create both one- and two-dimensional barcodes using any text you like: https://www.barcodesinc.com/generator/index.php. Go ahead and create a few for your test cases.
Step 7: Test the Barcode Scanner
You should now have a working barcode scanner and some barcodes to test it with. Go ahead and confirm that the text decoded by your scanner matches the text you used to create each barcode.
Conclusion
In this article, we learned what barcodes are and how they’re used in a variety of applications to help workers be more productive and improve day-to-day customer experiences. We then demonstrated how you can use Flutter to build a barcode scanner app. Since the app use smartphone hardware, we had to update the relevant configuration files for iOS and Android to enable use of the device’s camera.
You can now build apps that scan barcodes to improve businesses efficiency and connect consumers to information.
To learn more about how to be an effective and valuable mobile developer, visit the Waldo. It contains useful content on app design, development, and testing on Flutter and other platforms.